Follow along with this tutorial on how to use the innovative Lockdown plugin with VFX assets.
Have you ever needed to track and attach something to a warping surface in After Effects? While there are a few potential routes that could let you achieve that, you’d probably need to spend a substantial amount of time tweaking a huge number of keyframes along the way. Even then, you might not have the exact results you were looking for.
Enter Lockdown, an innovative plugin from the team at aescripts + aeplugins that allows you to not only track warped surfaces, but also to pin objects to them and even apply deformations from the warped surface to your object.
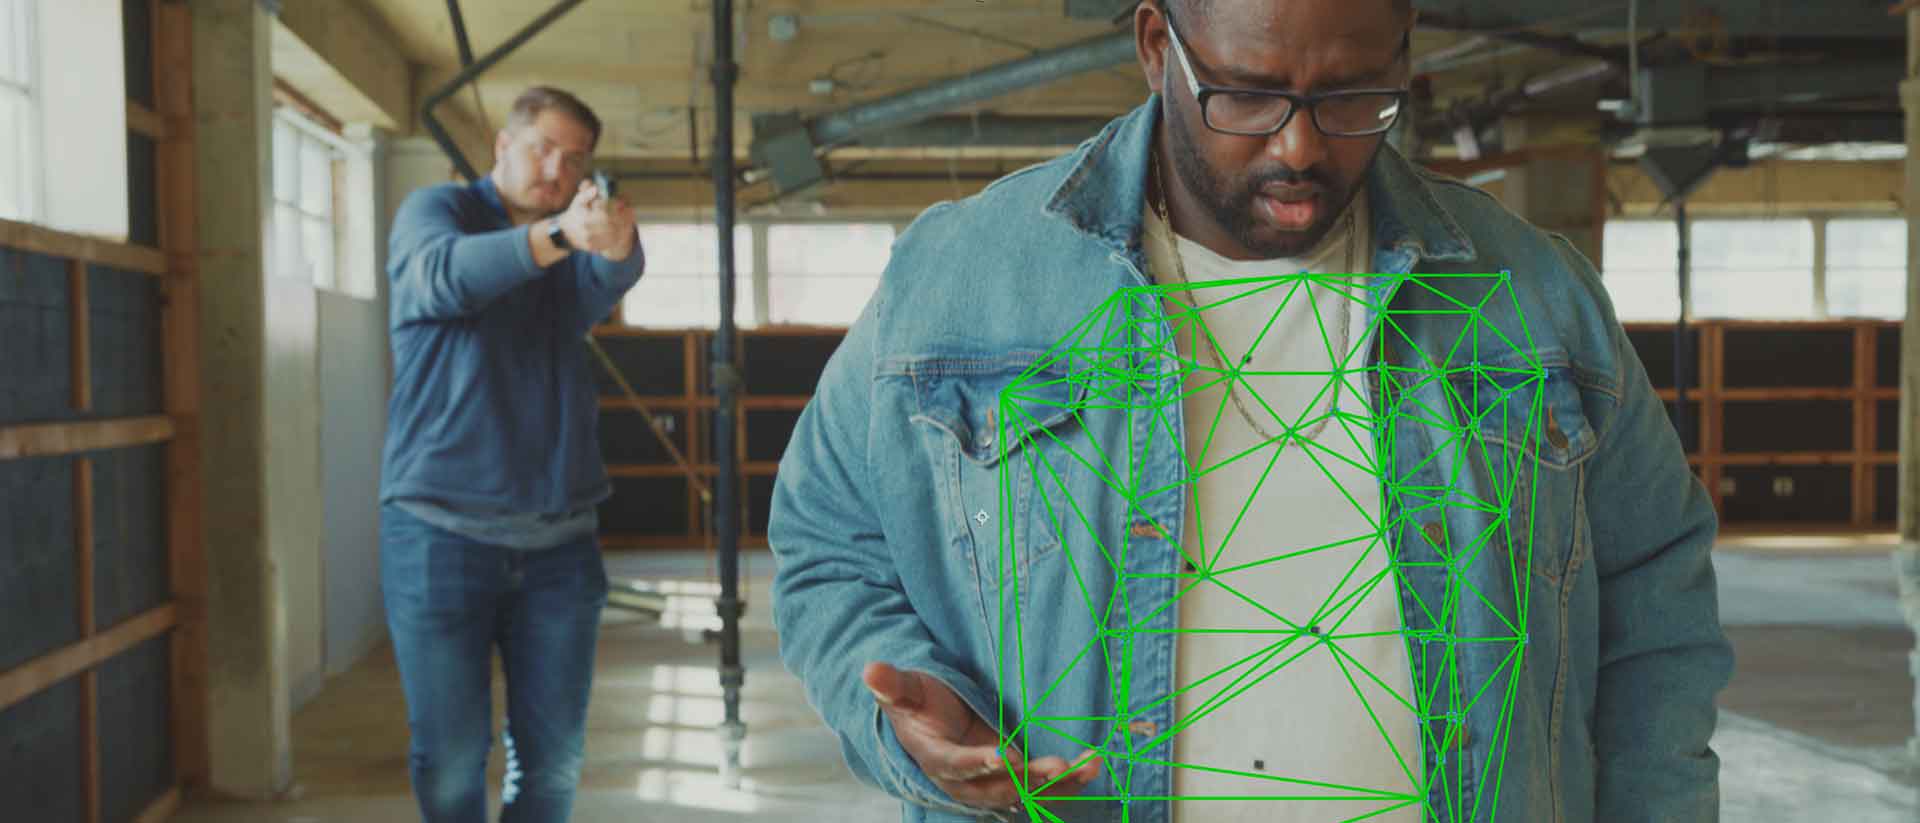
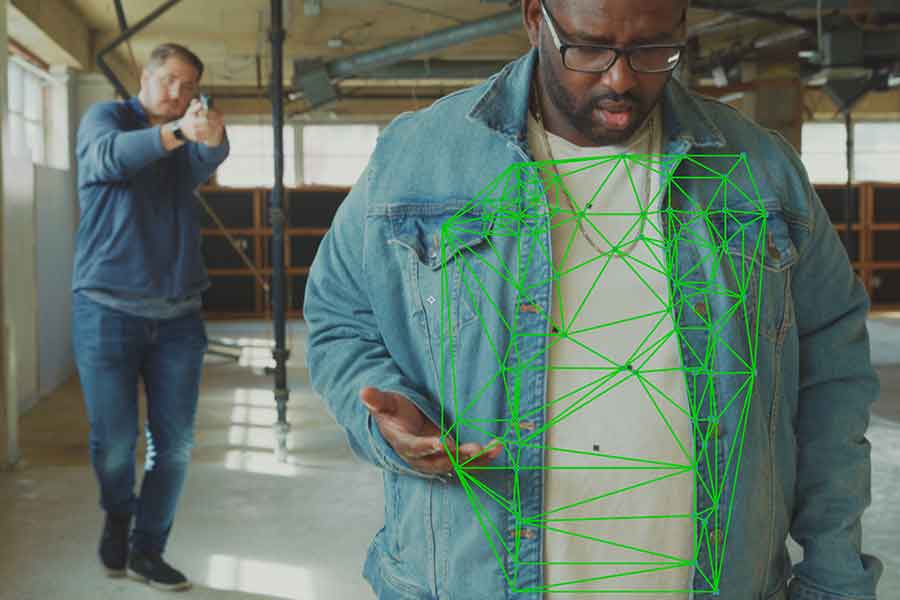
Check it out in action below!The magic comes from Lockdown’s ability to create a triangulated mesh from a cloud of data points (or imported tracking data from Mocha), which it then generates into a stabilized, independent pre-composition where you can add your VFX elements. Any changes you make to the pre-comp are immediately reflected in the primary composition.
Applications for Lockdown are so vast, but an absolutely perfect use for it that we’ve found is in conjunction with our pre-keyed Bleeding Fabricassets. In fact, we used it to create this VFX shot from our product video.
How to Use Lockdown in After Effects
The amount of automation Lockdown affords After Effects users is tremendous, but you do have to follow a strict process for proper results.
As explained in the video below, Lockdown’s workflow is initially a nine-step process, but it’s a little more complicated than that (luckily, the effects panel will walk you through steps 1-9). After that, the rest of the work is simply adding VFX elements to the stabilized pre-comp.After you select your footage and open the Lockdown script...
1. Select the “1 Pre-Compose” button in the Lockdown script panel.
2. The new comp opens with the Lockdown filter automatically applied. For optimal tracking, you may want to click the second button in the Lockdown scriptpanel (not the Lockdown effect panel) that says “2 Optional Tracking Filter”.
3. Ensure the Lockdown effect is selected in the effects panel, then CTRL+click (Windows) or CMD+click (Mac) and drag your tracking points on the footage in the composition window. As you click and drag, you can generate as many points as needed. You can then CTRL+click (Windows) or CMD+click (Mac) to place additional tracking points one at a time.
4. Click the “Press to Track Points” button under Lockdown in the effects panel. Tracking will begin and the Lockdown effect itself must remain highlighted in the effects panel during the duration of the track.
5. Check the box beside “Interpolate Partial Tracks” to smooth out any partially-tracked points.
6. Scrub the footage with the playhead to find a frame where your surface is as even as possible and click “Auto Triangulate Mesh.”Triangulated Mesh where Bleeding Fabric assets were placed in an ActionVFX product shoot.7. Click “Apply Mesh on this Frame.” You’ll notice the mesh you just triangulated has now been stabilized. After playing it back, you’ll most likely find additional areas that require stabilization. The goal here is to make your mesh as stable as possible, so you might need to run some more passes.
Troubleshooting Tip for Additional Passes: Navigate to 1:16 in the video above for help on adding additional track points to maximize your clip’s stabilization.
If you don’t require additional stabilization, continue on to step #8.
8. Navigate to the Lockdown script panel.
9. Click the “9 Lockdown!” button and wait for a dialogue box confirming your clip has been successfully locked down.
How to Add VFX to Your Lockdown Pre-Comp
Steps 1-9 are completed, but there’s more work left. Now for the fun part: adding our VFX to the stabilized mesh.
You’ll notice a new pre-comp has appeared in your current composition called “Stabilized - Your Clip Name.” Double-click to open it, and you’ll see two layers, one with your stabilized mesh clip, and another layer below it as a guide layer. Select the guide layer, press “U” on your keyboard to show all effects, and you’ll find a Time Remap keyframe marker on the timeline indicating the frame where you can add your VFX (this was the frame you initially selected in step #6).
Move your playhead to the Time Remap keyframe marker, and now you’re free to place your VFX elements as needed. When you back out to the primary composition, you’ll see the effects of the tracking and mesh warp on the assets you added. Great job!
If it feels like a lot to remember, don’t worry! Again, it’s especially helpful that the developers have built the script so that it walks you through each of these steps throughout the process in the script and effects panels.
Even though Lockdown was released just a couple months ago, the developers have already released significant updates to the plugin - the most notable one being the ability to use Lockdown with After Effects’ Face Tracker for some truly impressive results.This functionality makes Lockdown an incredibly powerful tool for beauty retouching/blemish removal or even adding scars and gore effects to characters.
You can purchase Lockdown or take advantage of its free trial from aescripts+aeplugins today!
Please note: only After Effects CC 2019 is supported currently, so you’ll need to make sure you aren’t trying to run it with an older version.
Check out the final renders from our creative team using the Lockdown plugin. We hope you enjoyed this in-depth look at Lockdown!
Want to see more blogs? Scroll up to the top and select a category or simply the "All" button for the most recent entries.
Remember to connect with us on our social networks to stay updated on our latest news, giveaways, announcements, and more!